How To Dye Glass Bottles Waterproof? [Procedure & Cost]
Glass dyeing is a technique that is used to give a see-through taint to clear glass pieces. Dyeing is used in DIY projects which call for transparent or translucent glass bottles. For instance, candle holders.
Dyeing glass bottles waterproof is essential as it facilitates their easy cleanup from time to time. This also allows your glass bottles to be water safe in case you want to hold water inside. Moreover, it prevents fading or chipping away of the dye used.
Even though food coloring mixed with some kind of glue or Mod Podge is a popular method of glass dyeing, it is not permanent. Neither does it guarantee the water resistance of the layer applied.
Therefore, this article discusses some amazing methods to dye your glass bottles, all the while ensuring that the tint is waterproof. Keep reading to know more!
How To Dye Glass Bottles Waterproof?
Dyeing glass bottles waterproof is easier than it seems. Below are 4 effective methods to dye glass bottles waterproof.
- Using Pebeo Vitrea Paint Colors and Paint Thinner
- Using Krylon Stained Glass Spray and Kamar Varnish
- Using Famowood Glaze Coat Resin And Alcohol Ink
- Using DecoArt Frost Gloss enamel paint
1. Pebeo Vitrea Paint Colors and Paint Thinner to Make Glass Bottles Waterproof
Pebeo Vitrea offers a range of water-based colors which are meant to adhere to glass surfaces. They are some of the strongest glass dyes which can withstand an awful lot of moisture.
Once baked, the paint layer becomes dishwasher safe as well. They have been used even on windows, giving durable results. Out of the total 20 transparent colors offered by Pebeo, you can choose any of them. Besides, they also offer frosty paints.
These paints are highly pigmented, and for that reason, they are thinned down using a thinner. It is advisable to use Pebeo paint thinner only.
Any other paint thinner might end up interfering with the chemical composition of the paint color. The Pebeo thinner adjusts the color strength and also extends the drying time, making the paint stay workable for a little longer.
Required Items
- Pebeo paint
- Pebeo paint thinner
- Thin brush
- Aluminum foil
- Foam brush
- Rubbing Alcohol
- Clean lint-free cloth
- Small bowl
- Oven
- Baking tray
Procedure [Step by Step]
1. Clean the glass bottle
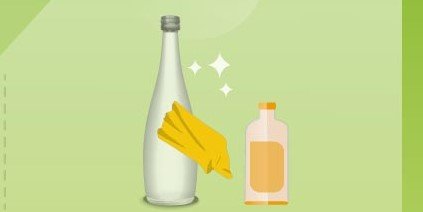
- Damp a clean lint-free cloth with a little amount of rubbing alcohol.
- Clean the glass bottle using the cloth.
- Make sure you don’t touch the glass once it is cleaned.
- Wait for half an hour so that all the alcohol evaporates and the bottle dries completely.
2. Mix the paint and paint thinner to make the dye
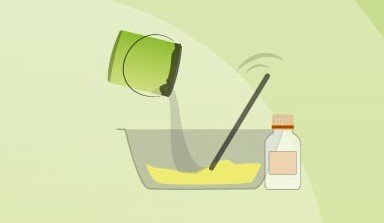
- Using a small brush, put a dash of paint in a bowl.
- Now pour some paint thinner into the bowl.
- The quantity of the paint, as well as that of the thinner, can be adjusted as per the depth of dye colour desired.
- Mix both of them well. The color will appear lighter once applied to the glass bottle, so make sure you do a spot test to see what depth of color works for you.
3. Paint the dye on the glass

- Dab the foam brush with the dye i.e. mixture of paint and thinner.
- Paint the glass bottle working upside down.
- Overlapping the strokes will give a darker tone.
4. Allow the dyed glass bottle to dry

- Let the bottle air dry for around 24 hours.
5. Bake the glass bottle
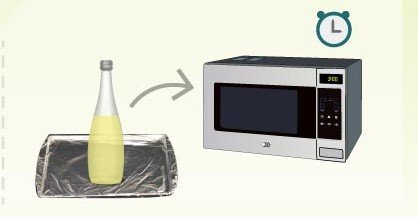
- Line a baking tray with aluminum foil.
- Put the glass bottle on the tray and keep it in the oven.
- Bake at 325°F (or 160°C) for 40 minutes.
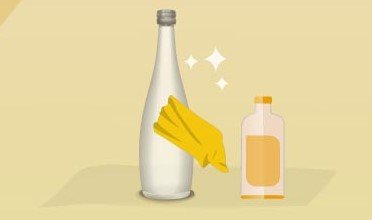
- When the baking is done, let the oven cool for some time.
- Once the oven cools, take out the glass bottle. It is ready to use.
Precautions and aftercare
- Before baking, the dye on the glass bottle can be rubbed off using a damp cloth.
- Don’t preheat the oven and also, don’t take out the glass bottle immediately out of the oven. Sudden temperature variations will weaken the glass, leading to its breakage.
- Pebeo Vitrea paints shouldn’t be shaken. You can gently stir them with a brush before using.
- Once dyed, the glass bottle should only be baked once, else it might burn or the tinge might darken.
Time
The whole procedure will take around 2 days to finish. This includes all drying and baking times.
Cost
Approximate cost of required items:
- Pebeo paint: $10
- Pebeo paint thinner: $5
- Thin brush: $5
- Foam brush: $5
- Aluminum foil: $5
- Rubbing Alcohol: $5
The total estimated cost: $35
2. How To Dye Glass Bottles Waterproof Using Krylon Stained Glass Spray and Kamar Varnish?
Dyeing the glass bottle by directly spraying paint is the most convenient method. Aerosol-based spray paint from Krylon is an incredibly water-resistant material. It also resists pressure washing and scrubbing.
Moreover, its composition doesn’t ruin the surface of the glass. It gives a light tint to the glass. This comes out very pleasant-looking in 1-2 coats. However, it requires several coats if you want to increase the opacity.
Using Kamar Varnish Spray from Krylon as a top coat seals the tint seamlessly. It is a synthetic varnish that gives extra protection to the dyed glass. This non-yellowing varnish protects against moisture and UV light. It holds well with stain glass spray and dries super quickly.
Required Items
- Krylon Stained Glass aerosol paint
- Krylon Kamar Varnish
- Dropcloth/Plastic sheet
- Rubbing alcohol
- Clean lint-free cloth
Procedure [Step by Step]
1. Prepare the working surface

- Make sure you do this project outdoors.
- Spread a big enough drop cloth on the working surface.
2. Clean the glass bottle
- Put some rubbing alcohol on a lint-free rag.
- Wipe down the glass bottle using the rag.
- Once the bottle is free of dirt, oil, or any fingerprints, avoid touching it.
3. Spray the dye coat on glass bottle
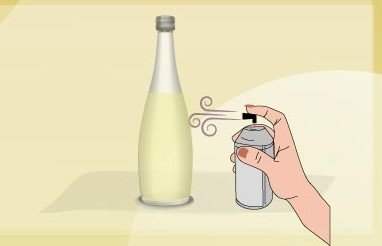
- Shake the can as vigorously as you can.
- Open the can and keeping the can 7-8 inches away, spray a light coat of dye on the bottle.
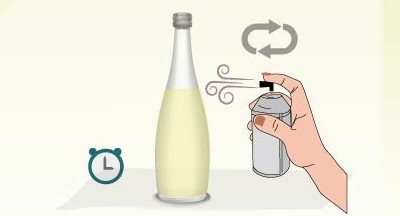
- If you want a darker tinge, wait for 2-3 minutes and spray another coat.
- You can coat as many layers as you want, depending on the tinge.
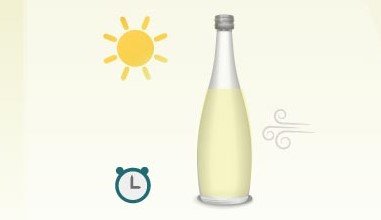
4. Allow the bottle to dry

- Wait for 24 hours so that the dye sets and dries completely on the glass bottle.
5. Spray the varnish topcoat
- Shake the can of varnish vigorously for around 2 minutes.
- Spray one coat of varnish, on the perfectly dried glass bottle.
- It will be dry to touch in around 15 minutes.
- Wait for around 2 hours before the bottle is ready to be handled.
Precautions and aftercare
- If the glass bottle has some dirt or oil on the surface, it will cause the dye to chip off easily.
- Since the aerosol sprays are toxic, using a respirator mask is highly advisable.
- Check the nozzle of can before spraying. Any drips can ruin the evenness of applied dye on the glass bottle.
Time
It will take 2 days before the entire procedure is done.
Cost
Approximate cost of required items:
- Krylon Stained Glass aerosol paint: $10
- Krylon Kamar Varnish: $20
- Dropcloth/Plastic sheet: $5
- Rubbing alcohol: $5
The total estimated cost: $40
3. How To Dye Glass Bottles Waterproof Using Famowood Glaze Coat Resin and Alcohol Ink?
It is the basic property of resins to repel water. FamoWood Glaze Coat is an ultra-clear epoxy resin that is waterproof and dries to a high-gloss finish.
The resin polymers once properly cured, form a water-repellent barrier. Glaze coat resin is quite versatile so it is fit to go over your glass bottles. It is acid-free as well.
To add pigment to the resin coat alcohol inks are used. They are alcohol-based solid dye inks. The drying time of these inks is less. Being solid dyes, they are highly pigmented. But once the resin cures, the effect of dye comes out to be transparent or semi-transparent.
Resin and alcohol ink blend evenly with one another. Alcohol ink goes well with resin and doesn’t react with producing adverse results like certain water-based inks. Moreover, it produces minimal air bubbles in the resin coat.
Required Items
- Alcohol inks
- Glaze coat resin
- Foam brush
- Containers and stick
- Rubbing alcohol
- Butane torch
- Lint-free cloth
- Newspaper/paper
Procedure [Step by Step]
1. Clean glass bottle with alcohol

- To avoid drips and stains, cover your working surface with sheets of newspaper.
- Put some rubbing alcohol on a clean lint-free cloth.
- Gently rub on the outside of the glass bottle to get rid of dust, dirt, or fingerprints.
- Allow the bottle to sit for around 30 minutes so that it dries well.
2. Make resin solution

- In a container, put equal amounts of hardener and resin.
- Using a popsicle stick mix thoroughly and slowly until about 6 minutes.
- Keep scraping the sides and bottom of the container using the stick so that no mixture is left unmixed.
- Pour the solution into another container and blend for another 6 minutes in the same manner as done earlier.
- The temperature of the solution will rise a little.
3. Add alcohol ink to the resin
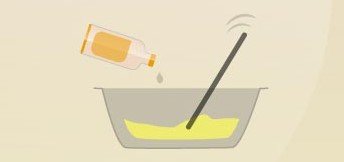
- Pour 2-3 drops of alcohol ink of any colour of your choice, in the resin solution.
- Mix well to distribute the dye pigment evenly in the resin.
4. Coat the glass bottle with the resin dye

- Dip the foam brush in the solution.
- Making sure that the bottle stands upright on an even surface, paint the dye on the bottle.
- Avoid overlapping the strokes too much, as this might result in a darker dye and uneven resin.
- Blow a heat gun, keeping it 4-5 inches away from the bottle. This will remove formed microbubbles in the resin.
5. Allow curing of the dye coat
- Let the glass bottle sit overnight. The next day, the dye will dry and it will be ready for gentle handling.
- However, complete curing of the resin dye will only occur after 48-72 hours from application.
Precautions and aftercare
- Make sure that you only make as much resin solution as the glass bottle requires. Hardener and resin, once mixed, can’t be stored for long.
- It is not recommended to add alcohol ink more than 3% of the weight of the FamoWood resin solution.
- Alcohol inks are flammable, therefore heat gun shouldn’t be brought too near the glass surface.
Time
This method will require around 3 days before the dye of the glass bottle is perfectly cured.
Cost
Approximate cost of required items:
- Alcohol ink: $10
- Glaze coat resin: $20
- Foam brush: $5
- Containers and stick: $10
- Rubbing alcohol: $5
- Butane torch: $20
The total estimated cost: $70
4. How to dye glass bottles waterproof using DecoArt Frost Gloss enamel paint?
Enamel paints are generally used in glass painting. They adhere well to the smooth and non-porous surface of the glass. However, unlike common enamel paints, Frost Gloss enamel paints from DecoArt are safe to dye clear glass.
Their formula is dishwasher safe, which means it has resistance against water as well as high temperatures and hard detergents.
These Frost Gloss enamels are basically water-based acrylic in nature. They provide a matt, frosted glass-like finish to the glass, once they cure.
DecoArt Frost enamels contain no harsh chemicals. This makes them non-toxic in nature. They can safely be used for indoor as well as outdoor projects. And also, the translucence of the enamel coat can be adjusted very easily.
Required Items
- DecoArt Frost Gloss enamel
- Cosmetic sponge
- Rubbing alcohol
- Aluminum foil
- Oven
- Small bowl/color palette
- Baking tray
Procedure [Step by Step]
1. Clean the glass bottle surface

- Wet a cosmetic sponge with some rubbing alcohol.
- Doing circular motions, gently rub off the glass bottle.
- Wait for half an hour for the alcohol to evaporate completely.
2. Coat the glass bottle with enamel dye

- Shake the bottle of enamel dye well.
- Pour some dye into a small bowl/palette.
- Dab the cosmetic sponge with the dye.
- Smear the glass bottle with the stained sponge, using unidirectional strokes.
- Adjust the depth of the dye by increasing or decreasing the amount of enamel you’re applying.
- Make sure you don’t load the sponge heavily at once. Instead, 2-3 lighter coats will give better results. Do a second coat only after the first one dries.
3. Let the dyed glass bottle dry

- Leave the glass bottle to dry naturally for 4 days straight.
4. Bake in an oven

- Once the dye dries, put the bottle on a baking tray lined with aluminum foil.
- Keep the tray with the glass bottle, in a non-preheated oven.
- Turn the oven on. Bake the bottle for around 30 minutes at a temperature of 275° F (or 135°C).
- After the baking is done, open the oven door partially. Wait until the oven cools before taking out the glass bottle.
Precautions and aftercare
- Avoid pressing too hard on the glass while coating with the sponge. This might end up displacing the dye from the smooth glass surface.
- Instead of a sponge, a soft natural-bristle brush can also be used to paint the dye.
- The dyed glass bottle will be dishwasher safe only after it has been baked.
- Food contact should be avoided.
Time
The whole procedure will take 5-6 days to finish. However, the actual coating will only take less than an hour.
Cost
Approximate cost of required items:
- DecoArt Frost Gloss Enamel: $10
- Cosmetic sponge: $5
- Rubbing alcohol: $5
- Aluminum foil: $5
The total estimated cost: $25
Final Words:
Once you know how to dye your glass bottles waterproof, you can go on making flower vases, candle holders, and whatnot with them. All you need to do is clean the bottle, then choose any method, whose appearance you’d prefer more.
- Pebeo Vitrea paints are the darkest compared to other methods in the list, however, they can be easily thinned down using thinner. They adhere strongly to the glass.
- Krylon stain glass spray would give the lightest tinge in one coat. Moreover, it is the easiest way to dye glass.
- FamoWood Glaze Coat and alcohol ink would be very durable for long since the resin is a thick layer in itself. The resultant tinge of dye would be an intermediate between light and dark.
- Lastly, the DecoArt enamel is completely dishwasher safe and you can prefer it to give a very light and frosty appearance to your glass bottle.


